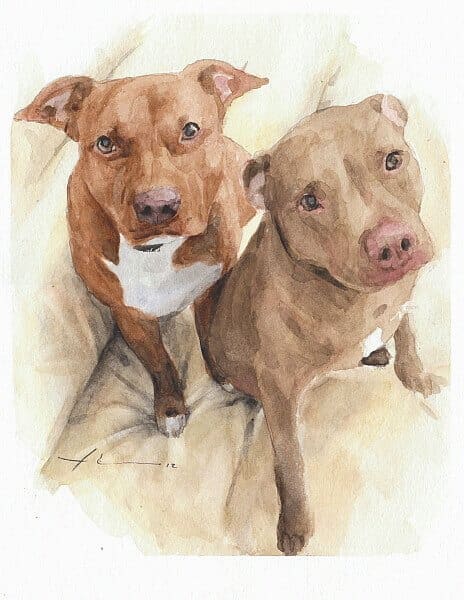
My watercolor painting process | |
 |

|
Let me to explain my process in painting this watercolor portrait. | |
|
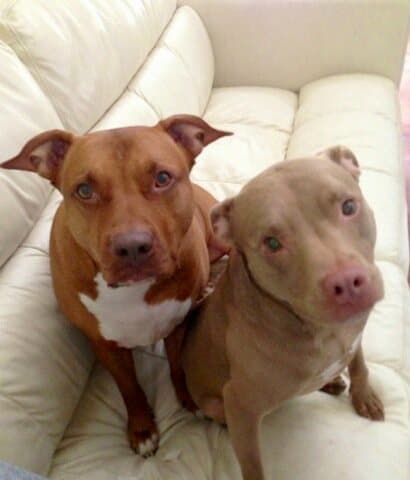
Before I did anything, I determined my 'focus.' Focus is what I wanted a viewer of the final portrait to see (or feel). I gleaned my focus from what struck me most about the reference photo I was given by my customer to paint — how gentle the dogs' eyes looked!
1. First, I painted the entire portrait in my mind. I tried to envision each color, each brush I would use, every step below. 2. Second, I cropped the customer's reference photo to direct more attention to the dogs' eyes, and make the composition a bit more balanced. I did this in my head, but cropping by using thumbnail sketches works well. Then I drew an outline of the major features using a dark pencil (4B). (See more detail about composition in my drawing lesson on 'composition.') 3. Next I determined where the strongest light source was, and if I wanted to alter the lighting. For example, considering my focus (gentle eyes) how bright should the lightest spot be? How dark the darkest spot? (See this notion explained in more detail in my painting lesson on 'light movement.') I decided 'gentle eyes' begged for softer shadows between and under the dogs, as well as more contrast in the eyes to draw attention there. 4. Fourth, I mixed all my colors. And on a piece of scrap paper I tested each color individually for hue/intensity and together for harmony. I'm not going to list my colors here because I think it might be best to trust yourself to pick them. You probably feel more challenged, more surprised by your own preferences, and probably more rewarded by the result. Anyway, I tried as always to mix enough of each color so I wouldn't run out while painting. 5. I painted the couch. I did so by masking the dogs with a regular, latex masking fluid first. Next I painted the couch by wetting the paper with clean water, and painting my colors on wet so the colors would run together and look more smooth like the couch surface as a result. When the couch dried, I painted some subtle shadows in the folds. And I created highlights along the folds by removing some dried paint with a clean, wet, and small oil-paint brush dabbing away the loosened paint with a clean rag. I painted until I felt the couch was finished. And I let it dry. 6. Next I removed the masking from the dogs. And I painted them. For the dog's sharp features, I painted only on dry layering my colors from lightest to darkest, allowing each layer of paint to dry before adding the next layer. This way I built up intensity and lastly added shadows. Then I used a small, damp, watercolor brush to blend the edges of the layers together around the eyes. I wanted more smoothness and realism around the eyes in hopes the realism would draw your attention. 7. Seventh, since watercolor often leaves a dark edge or 'halo' after it dries, I used a small damp brush again to soften all halos on the lighted side. 8. Finally, I corrected subtle problems by looking at my painting anew or with fresh eyes. Fresh eyes are usually achieved by looking at your work an hour or so later, but I often saw this painting anew much faster by turning it upside down, squinting, or looking at it in a mirror. Fresh eyes helped me see and fix problem areas. (See my lesson on 'watercolor critique' or 'light movement' for more details on seeing with fresh eyes.) That's it! | |
by Mike Theuer  , 2013 , 2013
|
|
